Implementing Personalization with AddSearch
You can implement personalization using the REST API or the Search UI Library. This guide explains how to prepare your data, implement personalization, configure settings in the dashboard, and test your setup.
Preparing Data for Personalization
Personalization requires indexed structured data with custom fields. These fields represent attributes like product categories, seasonal tags, or other properties reflecting user preferences.
The simplest way to add custom fields is by using meta tags on your web pages. Example of a custom field defined via meta tags:
<meta name="addsearch:custom_field" content="digital" />
When users click on products with such custom fields, future search results can prioritize similar items.
Important: Custom fields used for personalization must be of the TEXT type.
For more details about defining and using custom fields, see Using Custom Fields.
Implementing Personalization
Personalization support depends on your integration method. It is currently supported via:
Cookies set by AddSearch client libraries are 1st-party cookies, associated directly with your website.
Using the Search UI Library
Follow these steps to enable personalization tracking in your Search UI implementation:
-
Enable personalization tracking and set the cookie expiration (default is 180 days). This function just enables tracking but does not handle user consent.
// Enable personalization tracking: isEnabled (false by default), expirationDays (180 default)client.enablePersonalizationTracking(true, 180); -
Handle user consent for storing the AddSearch user token cookie.
By default, storing the cookie is disabled. Enable it if the user consents to cookies, or if your site stores cookies unless explicitly declined.
client.consentAddSearchCookie(true); // Enable storing user token cookieThe cookie is named "addsearchUserToken" and contains the user token used for personalization.
-
Set the user token in the client by reading it from the cookie or session.
client.setUserToken(client.getUserTokenInPersonalization()); -
Optionally, set a custom user token instead of the default AddSearch-generated one.
client.setUserToken(yourUserToken);client.setStatsSessionId(yourUserToken);
Using the REST API
To implement personalization via the REST API:
-
Assign each website visitor a unique user token, typically stored in a cookie.
If you already have tokens from tools like Google Analytics (_ga cookie), reuse them. Ensure compliance with your privacy policy when handling personalization cookies.
-
Include this user token as a GET parameter in search API requests:
https://api.addsearch.com/v1/search/1bed1ffde465fddba2a53ad3ce69e6c2?term=personalisation&userToken=test_user -
When users click search results, send their token in the Analytics API's click event (
sessionfield):{"action": "click","session": "test_user","keyword": "personalisation","docid": "abc123","position": 1} -
Set your personalization cookie expiration according to your privacy policy.
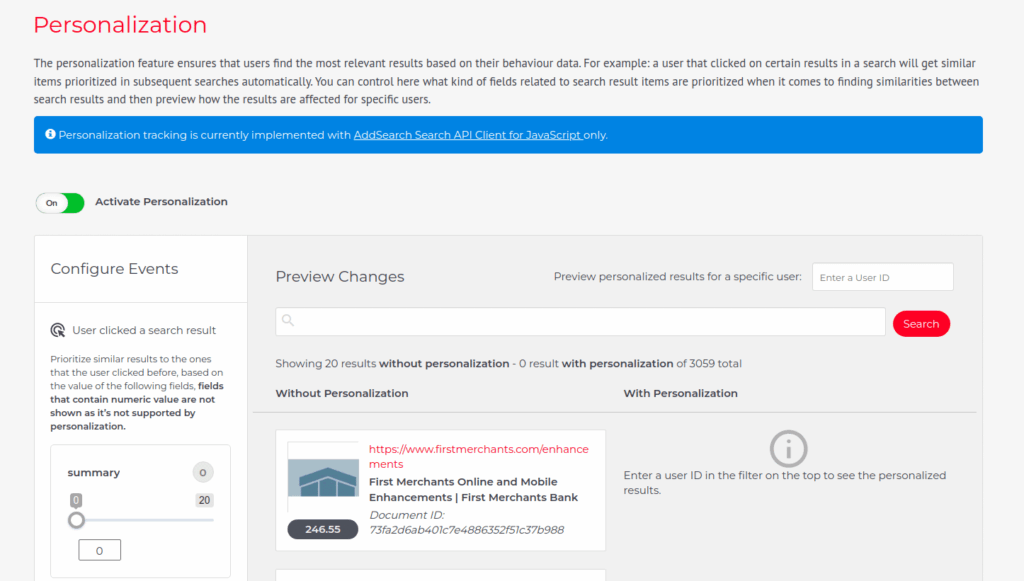
Configuring Personalization in the Dashboard
After indexing custom fields and implementing personalization tracking, enable and configure personalization in your AddSearch dashboard:
- Navigate to the Personalization section.
- Enable the personalization feature.
- Select the custom field to use for personalization.
- Assign the weighting factor for the custom field.
Start with weights below 100 and adjust based on testing results.
Testing Personalization
To verify your personalization setup:
- Open your search page or widget.
- Perform a search using a test keyword.
- Click on a search result tagged with the custom field you configured.
- Open your browser's Developer Tools (right-click > Inspect or press Ctrl+Shift+I / Cmd+Option+I).
- Under the Application tab, find the cookie named
addsearchUserTokenand copy its value. - In the AddSearch dashboard, paste this token in the "Preview personalized results for a specific user" field to verify personalized search results.
For details on defining custom fields and their usage, see Defining Custom Fields Using Meta Tags.
For more information on the API and client libraries, visit: